
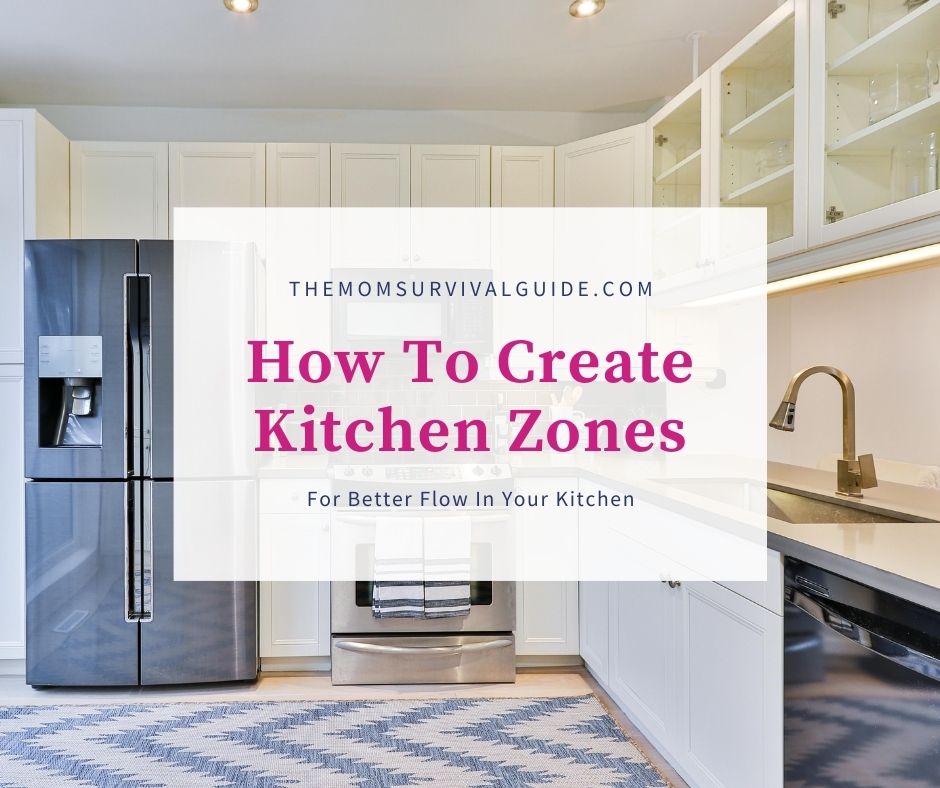
How To Create Kitchen Zones For Better Flow In Your Kitchen
Kitchen organization can be a big job, especially when you are not sure where to put things to begin with. I am here to tell you, kitchen organization is a lot easier if you start out by creating kitchen zones.
And once you have, you will realize that organizing your kitchen is not as scary as you thought. Plus, it will help you save time and keep your kitchen organized.
Here are 12 FREE motivation tips just for you…so you can start cleaning TODAY!
The form you have selected does not exist.
There are sponsored links on this page from which I may get a commission at no added cost to you. For more information, please read my Privacy Statement.
I can remember moving into both of the two houses I have owned. And I remember the difficult task of having to decide where to put things.
In our first house, the kitchen was small. Our house had been built in the 60’s and the kitchen had all the original cabinetry. Including cabinets that were mostly unusable due to their size or the fact that their usable space went back into a “blind corner”. Meaning you couldn’t see anything you actually put in there.
So I started putting things into drawers and cabinets only to realize that where I put things was not very convenient.
Over time, I learned that keeping the oven mitts over by the pantry…and on the other side of the kitchen from the actual oven…didn’t make a whole lot of sense.
And when I finally figured out how to arrange my kitchen the right way, it made a world of difference in how my kitchen functioned and stayed organized.
The form you have selected does not exist.
>>PRO TIP: When I don’t know how to do something, I make sure I learn. That is why I recommend this online organization class. From one mom to another, it is worth it to get organized so you can find things easier in your home and get things done faster.
Let’s Start With Decluttering the Kitchen Before Creating Zones
Sometimes our kitchens can become dumping grounds, storage areas, and just plain overrun by stuff. All of which do not allow us to use our kitchens for their purpose. Which is eating, cooking and gathering.
So let’s start with getting rid of the following things:
- Anything you have 2 or more of…you really just need 1 of everything unless it is a pot holder or utensils like spoons and forks…hopefully that is obvious.
- Anything you do not use regularly. I used to keep my electric griddle in the kitchen, but since I only use it on Christmas morning, I started storing it in the basement to free up space in my kitchen.
- Holiday and Special Occasion items. You do not need to keep you Christmas, Easter, and Halloween platters in the kitchen. Same goes for things you use for birthday parties. Instead, store these seasonal items in a storage area like the basement, attic, or storage room.
How To Create Kitchen Zones
First, you need to know what the kitchen zones are:
- Prep Zone
- Cooking Zone
- Clean Up Zone
- Put Away/ Storage Zone
So what do you put in these zones? Well, I am about to tell you.
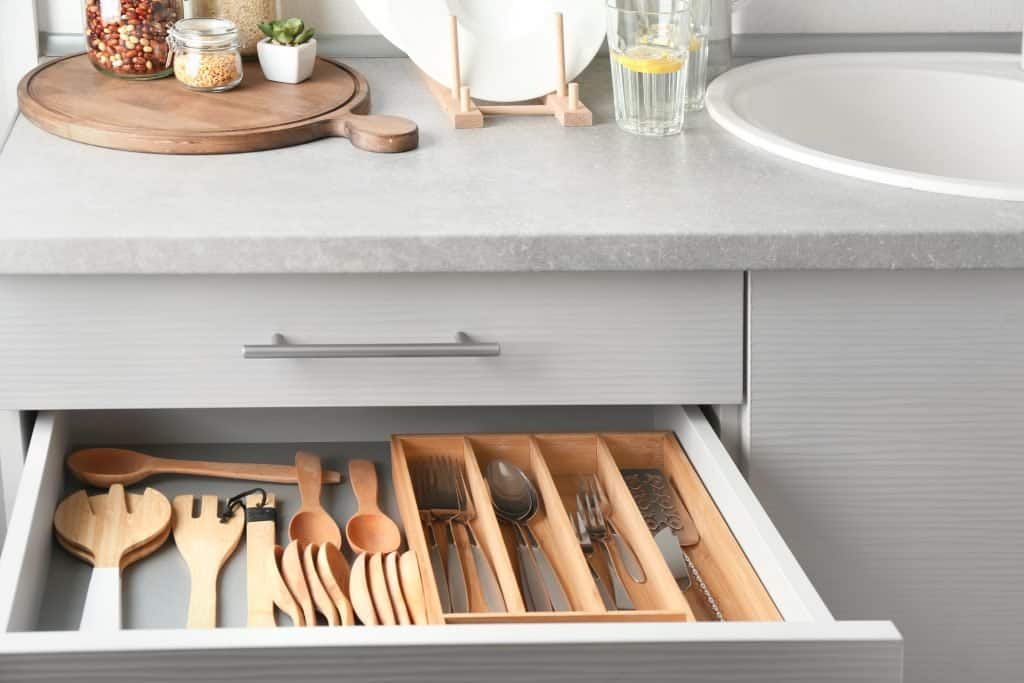
Prep Zone
The prep zone in your kitchen will consist of everything you need to use when prepping a meal. That means things like:
- cutting boards
- knives
- can opener
- peeler
- greater
- garlic press
- mixing bowls
- rubber spatulas
- whisk
- measuring cups
- measuring spoons
- and anything else you may use to prep meals
The place to store all of these items is in the space where you tend to have enough space to do the prep work. An island would work well for a prep kitchen zone, and so would a larger countertop space where you have room to work.
Cooking Zone
The kitchen zone where you do your cooking is also where you want to store your cooking utensils and other items you use while cooking.
Some examples are things like:
- skillets (this one is my favorite for eggs)
- cookie sheets
- metal spatula
- slotted spoon
- nonslotted spoon
- tongs
- spices
- cooking oil
- vinegar
- cooking wine
- and anything else you may use during cooking.
Normally the center for the cooking kitchen zone is centered around your stove top or oven. So the items you use to cook would be stored relatively close to this area in order for the best function of the cooking zone while you are cooking.
Clean Up Zone
The kitchen zone where you do your cleaning up is where you would store your clean up items. The following items may be what you use for cleaning up the kitchen:
- dish soap
- dish rags
- dish towels
- paper towels
- hand soap
- scrubbing sponges
- scrubbing brushes
- dish washer detergent
- any other items you like to use when cleaning up after a meal
The kitchen zone created around cleaning up will normally be located around the kitchen sink and dishwasher. So when you are looking to store items that would be used to clean up after a meal, look into creating a clean up zone close to this area.
Put Away/Storage Kitchen Zone
There is one last kitchen zone that is important to have. And that is a put away or storage zone. In this kitchen zone you would want to store the following items:
- sandwich baggies
- snack baggies
- glass storage containers
- plastic storage containers
- gallon size storage bags
- mason jars
- storage container lids
- foil
- plastic wrap
- parchment paper
- wax paper
- and anything else you may tend to use to store food
The kitchen zone used for putting away and storage is normally located slightly out of the way of the previous action zones. That way, if one person is cleaning up, another person can be putting way leftovers. And you are not in each other’s way.

The Best Way To Organize Your Kitchen Zones
Prime Real Estate…
When you start to organize your kitchen there are a few things that you want to consider after deciding where your zones will go. How often you use an item, whether it is in a convenient spot, and how an item will fit in the space.
The idea is that the kitchen is one of the most used areas of the house. Our kitchens’ are used for cooking, cleaning, family gathering, dropping mail, emptying lunch boxes, storage, meal times…you get the picture.
So having it organized is essential. But you also should realize that the kitchen space is prime real estate.
Meaning, if you want to store something in there, it needs to be a priority item.
3 things to consider before you start creating kitchen zones…
Consideration #1:
A priority item is one that you use on a daily basis, or almost daily.
Let’s start with how often you use an item. Things like glasses, plates, and bowls are obviously something that you use on a daily basis, so their residence in the kitchen is justified.
But what about things like your stand mixer, large serving platters, and your roasting pan? You may want to think harder about whether you actually need those items in your kitchen.
If you are an avid baker, then, of course, you should keep your stand mixer and other baking supplies close at hand.
But, if you are someone who only uses their stand mixer once a year to make Christmas cookies, then you probably could store it somewhere else in the house.
Same with your roasting pan. If you only use it on Thanksgiving, then maybe you can store it in your basement until that day.
My large serving platters get used every time I host a party or shower. So I keep them in the kitchen. But I keep them in a cabinet that is not used much because it is in a weird spot. So technically, they are out of the way and not taking up too much of the prime real estate in my kitchen.
Consideration #2:
The next thing to consider is whether the area where you want to store something is convenient. This is where your kitchen zones come into play.
Let’s think of it like this. If you were driving your car, would you want the radio buttons in the backseat? No. You use them every time you drive, so you want them right where you can reach them quickly and easily.
It would not be very convenient to have to park the car and climb over the seats every time you want to change the radio station.
Same goes for your kitchen.
If you have your glasses in a cabinet across the kitchen from your dishwasher, then it is going to take you longer to put things away. You will not want to do it if it takes a long time.
Same with your dish towels and dishrags. If you only use them near the sink, then you should store them near the sink. It doesn’t make sense to store them on the opposite side of the kitchen.
This is why we create kitchen zones. We want to store items close to where we actually use them so that things are CONVENIENT. Just like the radio buttons.
Consideration #3:
The last thing to consider before you decide on a permanent location for your items is whether or not they fit into the space.
Consider your cooking utensils. Putting them in a large deep drawer just doesn’t make much sense if they are rolling all over the place. Same for putting them in a cabinet.
Since they are mostly long and flat, then a shallow drawer near the stove or a utensil holder on the countertop would be the best options.
And the same consideration needs to be taken for large items. Obviously, you cannot store your giant crockpot in a shallow drawer. So even if that would be the most convenient spot, you still have to consider the fact that it just won’t fit.
Break it down into small jobs…
Once you have considered the three points above, then it is time to start moving items around.
Some people like to move everything at once, so they can see it all, know where they want to put things, throw things away and see how things fit.
Others like to do things a little at a time.
I like to take one cabinet at a time, think about the three considerations above, and decide if I can make that one area work any better. This takes me about 15-20 minutes.
I like doing a little each day or once a week versus using up a whole day and feeling totally overwhelmed by the mess.
This is what I recommend for you. Start off slowly. It will make everything more manageable.
Doing it all at once creates a lot more stress if you don’t get everything finished and put away.
Then your organization project starts to run over into the next day.
Or maybe even days after that if you are busy.
So my suggestion is to start small and finish each project before starting another.
Kitchen Zone Organization
Step 1: Visualize
This is the step where you think and picture the space in your head or on paper. Think about what is in the space you are about to re-organize.
How does it currently function for you and your family?
Could it function better if you changed its location, rearranged its contents or made the contents fit better?
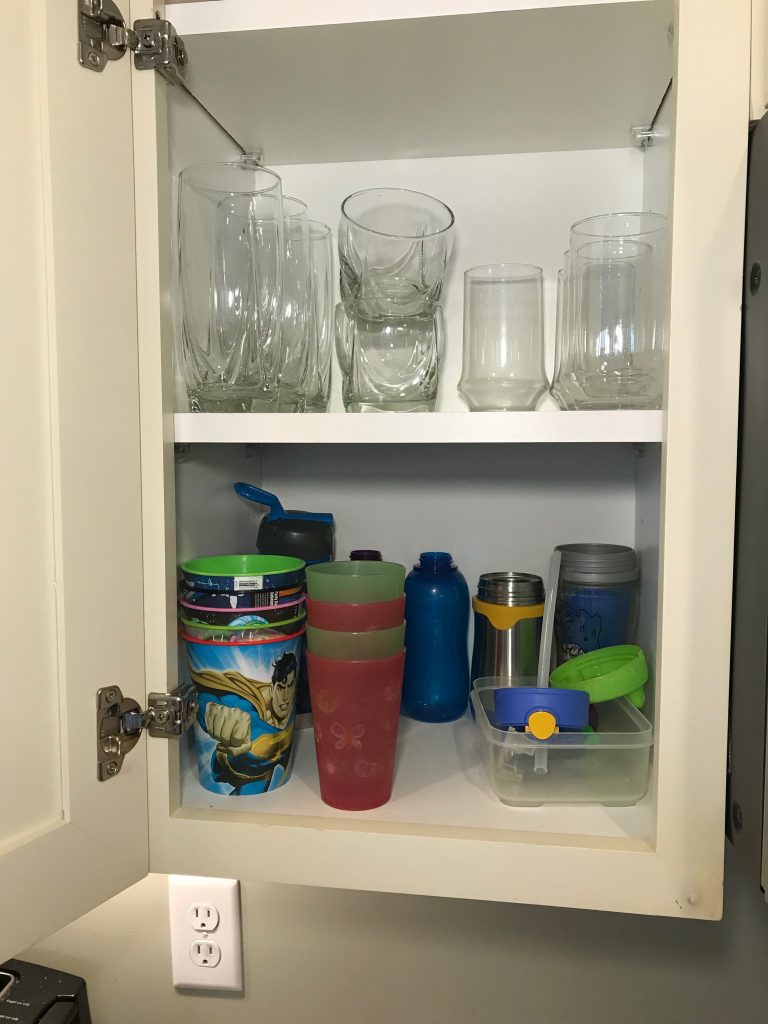
There is one cabinet in my kitchen that I am continuously re-arranging, adding to, and now finally I have relocated it to a completely different cabinet altogether.
This cabinet is the one that holds all of my kid’s cups. Not just cups, but their water bottles, drinking cups, lids, and straws. The cabinet always seems to get crazy and disorganized.
Obviously, my kids getting into it all the time doesn’t help the situation. But also the fact that we have way too many containers and cups in there is a problem too.
So I think about that cabinet a lot and visualize different ways that it could work better.
Step 2: Remove
Once you have decided what you want to do in the space, then remove the things that you want to re-organize.
Let’s go back to that pesky cabinet of mine. The one with all the kid cups. When I actually pulled everything out of the cabinet, I realized why things kept falling out when the kids would open the cabinet door.
There was too much stuff! It was as simple as that. But until I actually pulled everything out, I had no idea what was actually in there.
Step 3: Divide
This is the best step. Divide the contents that you just removed into 3 piles. One to pile to keep, one to donate, and one to throw in the garbage.
When I removed the cups from the kid’s cup cabinet, this is what I found.
Cups that they had not used since they were little. Cups that had no lids. Lids that had no straws.
I divided everything into my 3 piles..keep, donate, and garbage.
Step 4: Purge
Throw out the things in your garbage pile and load up the "donate" items to take to Goodwill! Simple as that!
Needless to say, I got to throw A LOT of things away the day I cleaned out the kid’s cup cabinet! YEA! I love it!!
Step 5: Add Containers
This is the 2nd best part of the process for me…the 1st is getting to throw things away!
So now, you get to look at the items that you are keeping and see if you can contain them somehow.
Let’s go back to the kid’s cup cabinet.
I know that the cups are not really the problem in this area. They stand up on their own, they are easy to see, and they normally don’t fall over. In other words, they are already pretty easy to see and find.
The part that holds our family up and takes up our time is trying to find the lids and the straws that go with the cups.
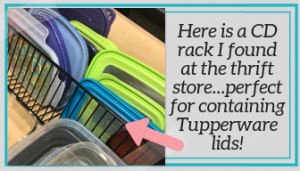
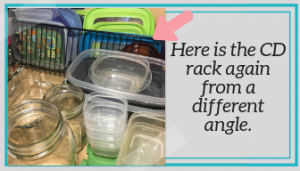
This is where you want to use containers. Containers will help you “contain” things that are an irregular shape and size, such as lids. They will also help you display things that you need to find faster…such as straws. This is my current setup and it works well.
Step 6: Replace your "keep pile" items
Here is what my final cabinet looks like.
Notice I don’t have tons of things in there. I have pared it down to just the essentials in this cabinet.
Then, I moved all of the water bottles we only use once or twice a week to another drawer. These are the sports bottles. I have used a container for them so they don’t roll all over.

Then, I put all of the straws and lids into containers as well so they are easy to see and pair up.
A few good tips for your kitchen.
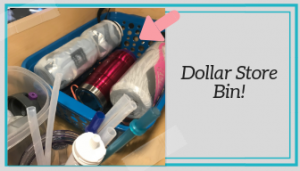
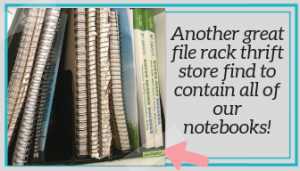
I am just going to show you a few items I have used creatively to organize my kitchen and for not much money.
These items either came from the dollar store or from the thrift store.
Another great rule of thumb is to find things you already own that can serve a purpose for organization in your kitchen.

Start Creating Kitchen Zones For Better Organization
Kitchen zones are one of the best ways to keep your kitchen functioning better for you and your family. And now that you know how to do it, I recommend getting started right away!
And hey! If you need more tips or just want to be able to ask me some questions, sign up for my email list using the sign up at the top of this post.
Happy Kitchen Zoning!

Related Posts:
Easy Lego Organization Tips To Stop the Mess In It's Tracks
5 Easy Family Command Centers that will Keep Your Head From Spinning
Reduce Closet Frustration With This Ultimate Guide To Color Coding

As a stay at home mom myself, I have found ways to keep myself sane and organized while loving what I do …be home with my kids! After 14 years of being home, I realized other moms may benefit from some of the tips and tricks I have learned over the years. Join me to learn ways to manage your home and life as a stay at home mom so you can make time to enjoy the best part…family. Things I love…feeling motivated, Harry Potter, being outside, and digging deeper into my life and my family’s life in order to make it better. I have a Degree in Biology and am also a freelance writer.